Scene setting and inserting the final shot set ups into the storyboard, so continuing edits can be made and the final footage from the timelapse and winter scenery, shot around Dundee in January can be framed in the shot.
Image directly below shows CG grass stems in Maya, with an image plane behind, of the landscape I filmed. I'm now using reference (left) of how water droplets form on stems and will recreate this in Maya (right).
Once all of this is complete then I will animate the melting ice men and then get everything into Nuke and begin comping it all together - including lots of light rays, God Rays and lens flare.
shot_10: Dressing to shot. I've deleted most of the tree and have just left the branches that appear in shot. The icemen have been removed and I will put some ice highlights on the branches...
Right: Perspective panel showing the image plane and IBL.
I've taken a screen shot of the sky footage and have created a jpeg file, with just the sky, for the purposes of rendering refractions. I've eliminated all the hills, grass etc for this shot, so that the perspective on the branches works.
Next step:
To replace the sky image with a screen shot of the green screen footage.
In this case, the image with the hand and finger pointing.
Creating a poly plane and using the sculpt tool to create a riven surface.
Then applying it, sculpting it and using the soft select tool to shape the vertices to the branch and then applying the mia_material_x shader, as per the icemen.
The will help the icemen 'sit' in the scene and be part of the ice on the branch.
Right: Perspective panel showing IBL sphere, two directional lights (one above the branches in the same position as the bright spot of the image plane footage, and another lower down to light the lower branches; both directional lights are set at 3.5 with a light gold colour. I've also included one point light underneath the branches, to give a rim and uplight in pale blue, to show the bounce light created by the snow...
Now that I have the eyeline established, I can remove the green screen image plane and insert the footage of the timelapse clouds, as a tiff sequence...so that the light refraction shows through the ice men
These images show the IBL (image based lighting, with a file node attached, showing a screen shot of the live action cloud footage), a test render of the tree with one simple direction light and the perspective panel showing the model, camera and directional light.
I've had another one to one tutorial session with Sang Yu, to make double check what render passes are required.
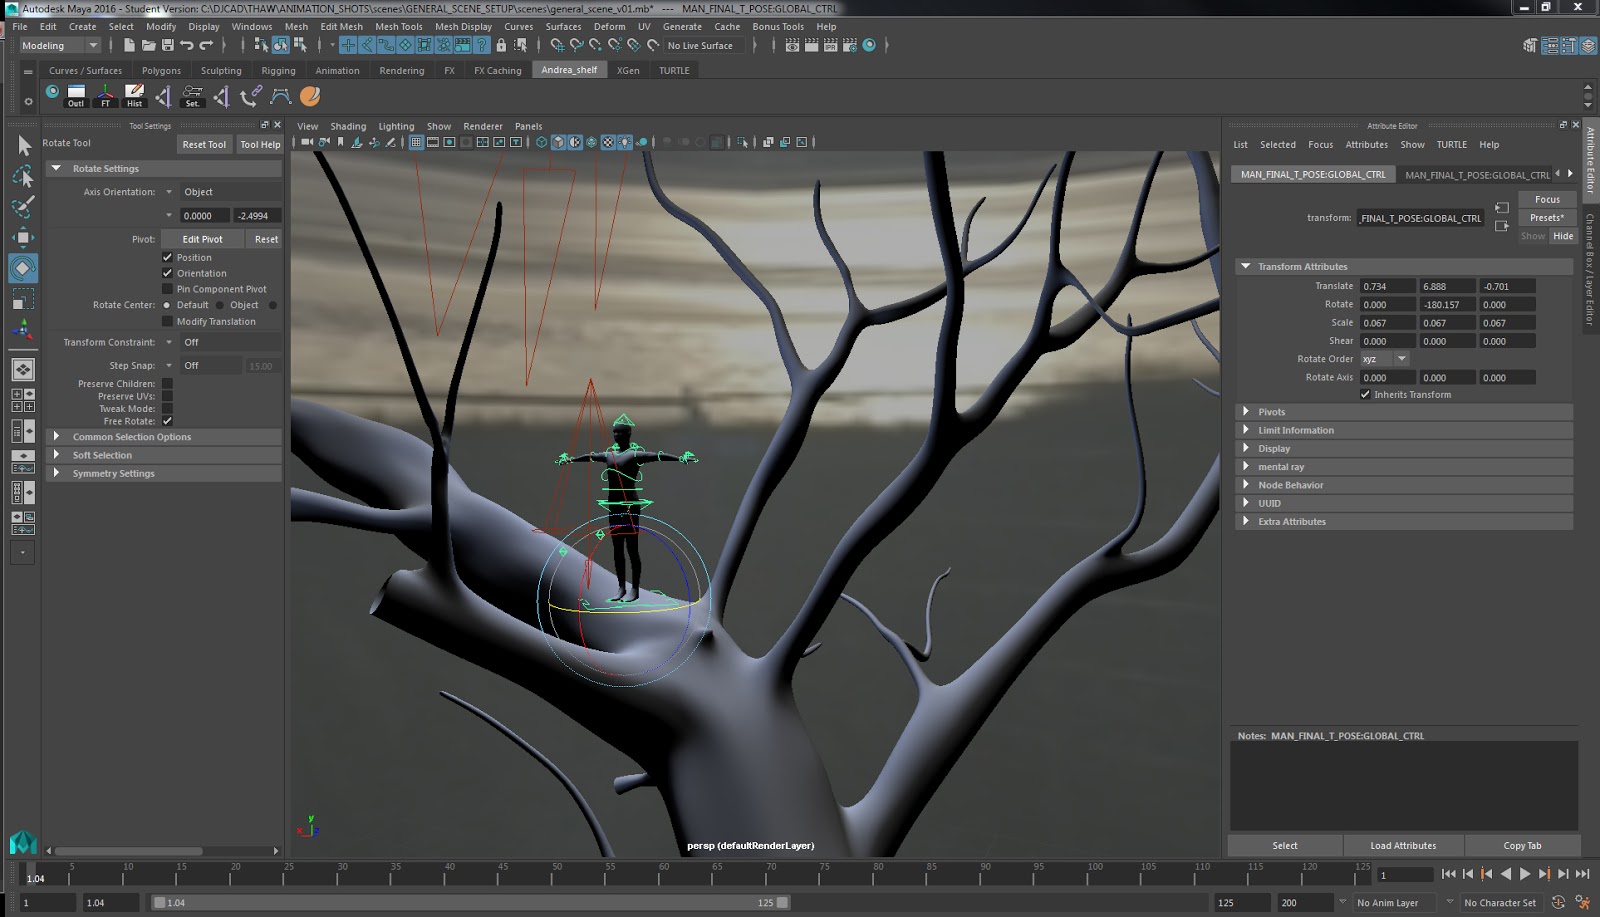
In order to make sure my scene is glitch free I am creating a base scene file, which will include IBL (Image Based Lighting), a section of tree, four ice men and an image plane.
To set the scene, and make sure the scale and eyelines are correct, I will use an image plane with a screen shot of the live action footage of the lead female character (Kerry Flemming actress) below.
Once the scene is set I can then remove the green screen shot from the image plane and replace it with a sequence of tiff files, showing the timelapse footage of the moving clouds
This timelapse footage will not form part of the final render, but is used so that the refraction of the light will be seen purely in the icemen...
The aim will be to comp all the green screen woman, the CG elements and the actual moving clouds timelapse footage together in Nuke; and for the refraction of the moving sunlight to be captured within the animation of the ice figures
Here's a recording of the one to one tutorial that I had with Sang Yu, to establish and set up which render passes will be required
And my previous one to one with Sang Yu, to establish the render settings, particularly with refraction.
Test render to tree section, with new bark texture
I've created a normal map from this texture, in Photoshop and have applied both the texture and normal maps in Maya.
Then I've exported it into Mudbox, created a new paint layer, created a stencil with the image and then used the projection tool in the paint settings to paint the texture directly onto the branches. This will enable me to rotate the texture (rather than the UV) so I can make sure the grain of the bark is rotated correctly, as per the orientation of the branches.
Portion of tree, with new UV map created with the bonus tool
Texturing in Mudbox. I've changed the wireframe colour to green (just a personal preference as it's similar to Maya in appearance).
Image below shows the geometry selected, with a new paint layer. A stencil created from the 2k image and the projection tool.
The stencil appears as a flat image on top of my geometry; I can then use my graphics tablet and pen to 'paint' the stencil onto the tree. Once I am happy with that section I can rotate, scale, move the stencil and paint again...
New 2K texture map from Kirkdunne.com
Normal map created in Photoshop [filter>3D>generate normal map]
I've been adjusting the size of the branches of the tree, compared to the green screen footage and the icemen. If the icemen are too large they take on human scale proportions, which is confusing both from a storytelling point of view and a scaling point of view within the scene. If the icemen are small - almost the size of a small snowy icy drift caught in the branches we, as the audience, will upon first glance ask ourselves 'what are they? ice formations? men? characters? figments of the woman's imagination?'
With scaling the entire tree and associated textures, the render was slow. In 'dressing' the tree to shot (cutting off any unnecessary branches) the render time is signifiantly reduced.
I have the original tree file available for any mid to wide shots in other scenes.
This will require a new UV map, for these particular branches; the screen shots below show where the UV map is now incorrect (indicated by blurred sections on the branches).
Yesterday I had a one to one with Sang-Yu, to double check all the render settings and passes, before I get stuck into the animation
Below is a recording of the tutorial, showing the setting up of the render layers and then the render pass settings...
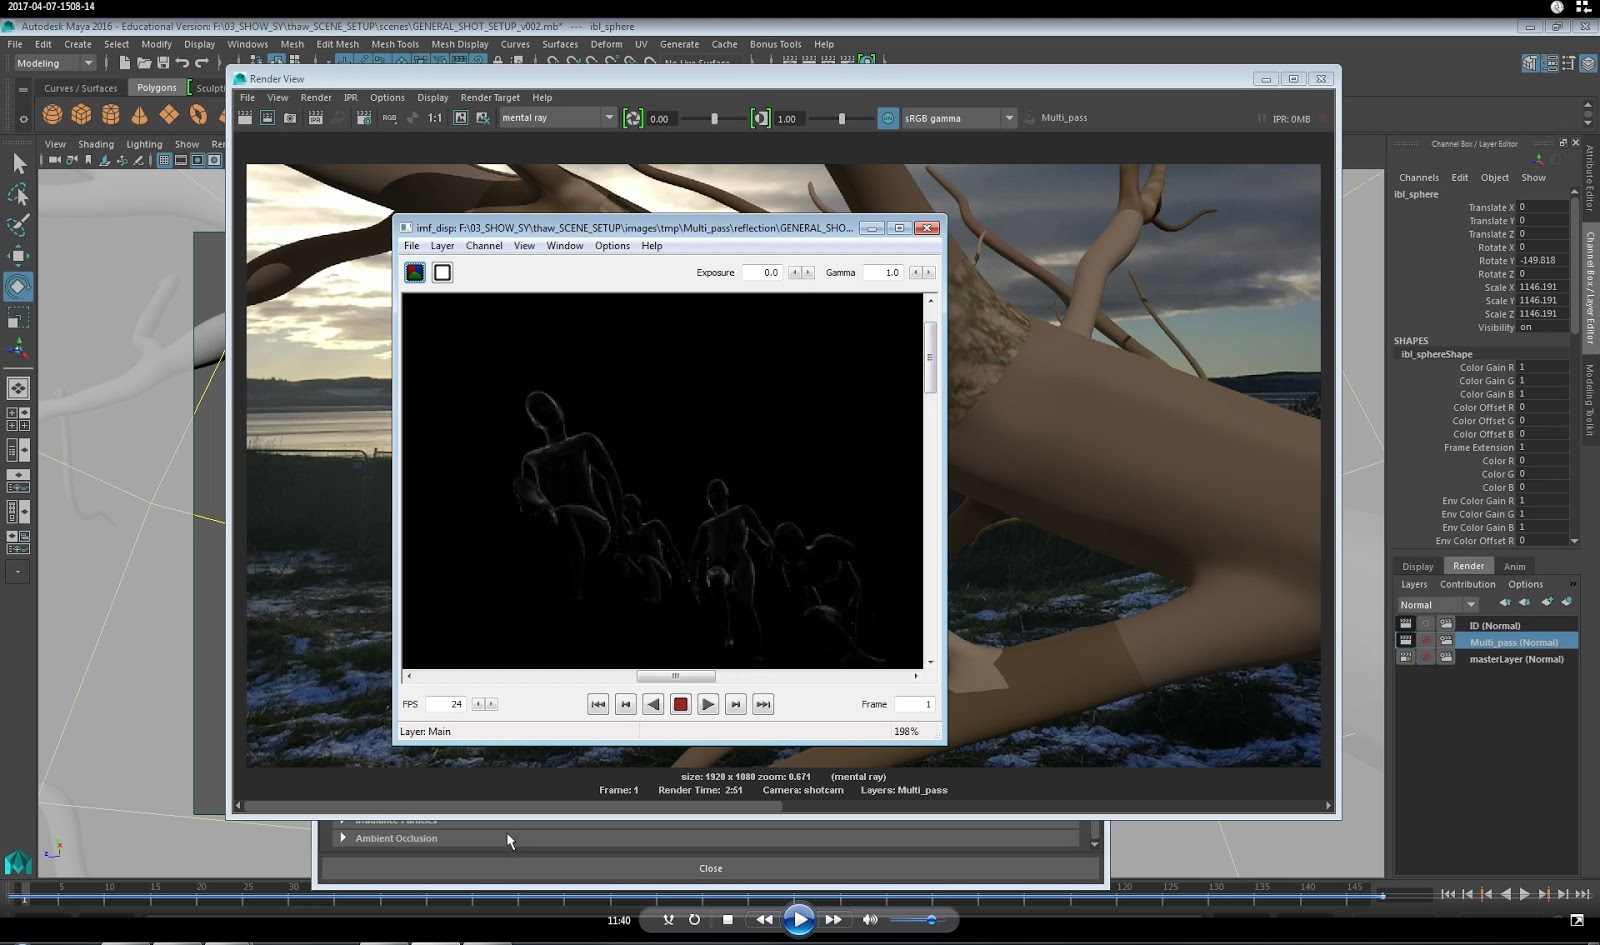
Setting up the associated multi-passes in render settings, and creating a duplicate render layer of the master layer.
New tree section requiring a new UV map; with the reflection multi-pass window
Set in Belfast (filmed on location in Sheffield and Liverpool) in 1971 - this film has one of the best chase sequences I've seen (clip below). Set in real time, with fast paced cuts, exhausting sound effects and relentless persuit through alleys, houses, bombed houses and streets. The special effects shrapnel, brick shards and concerete splinters, created by gun shots, were utterly convincing and the sound effects were incredible.
The post explosion scene (a home made bomb exploding in the back of a pub) was haunting, particularly by the use of distorted high pitched whistling silence and, as a viewer, I was completely disorientated by the lack of sound
The storyline was completely believable, and it was only at the end of the film that I remembered that the whole story was based in one single day/night.
The art direction was invisible and utterly convincing...from the house interiors, the external streets, the bombed out dressing and special effects...
Reminded me of the constant threat of bombing in London whilst growing up....and it was something we simply got used to.
I need some help with setting up the image planes and eyelines for my composition shots, involving the CG elements and the green screen live action....
so in the meantime, I've been following some tutorials on creating glass effects in After Effects