Below:
Photoshop mock up of the live action and CG elements. This mock up comprised of a screen shot of the After Effects pre-comp of my actress and sky, plus a Photoshop layer showing a screen grab of a test render of the icemen.
Below:
Maya scene. Image plane shows the Photoshop mock up above; with the CG icemen as viewed through the new camera position. This way, I could recreate the approximate position of the iecmen, and make sure that Kerry's eyeline was correct.
In the final grading in comp there will be a blur on the foreground icemen and the sky; so that the focus will be on Kerry's expression.
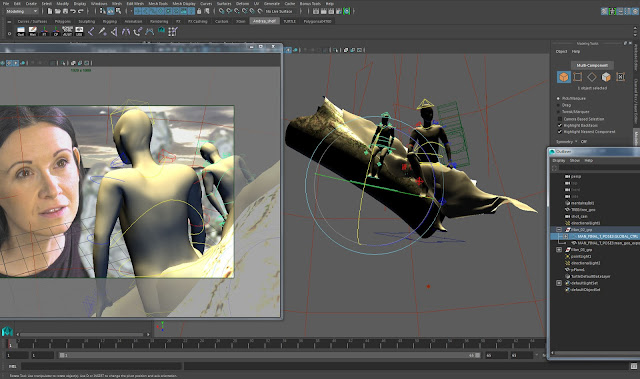
Below:
Maya UI showing the perspective space (right) and shot_cam tear off panel (left)
I used the tear off panel, so I could work in the perspective space and see immediately how the results and framing would look in the camera view.
Test render below
Below:
Test render time at full HD resolution is currently at 11 mins 52 seconds per frame.
Namely: Shot_07 through to Shot_13...(other than camera zoom, shots 7,9,11 and 13 are the same set up. The same with Shot_08 and Shot_10 which are also the same.
Shot list below, includes
frame start/finsh: shot number; details and notes of duplicated set ups; frame quantities


No comments:
Post a Comment