Friday, 31 March 2017

Prelude CC to view green screen footage - and positioning CGI elements with no camera movement

So, the next step, before I start animating, will be to position the tree and my icemen correctly, according to the eyeline of my actress, Kerry.
There is no camera movement, so there was no need for any tracking markers or subsequent camera tracking in Nuke.
For the purposes of positioning the icemen and tree correctly, I am going to take a snap shot of one of the green screen frames and then apply that to the scene, by way of an image plane in the foreground. I can then position the shot_cam correctly and know that my icemen will be in the correct position.
This is shot 12...

Animatic image shot_12
Characters on branch, prior to adjustment

Using the reference node to duplicate rigged characters in Maya


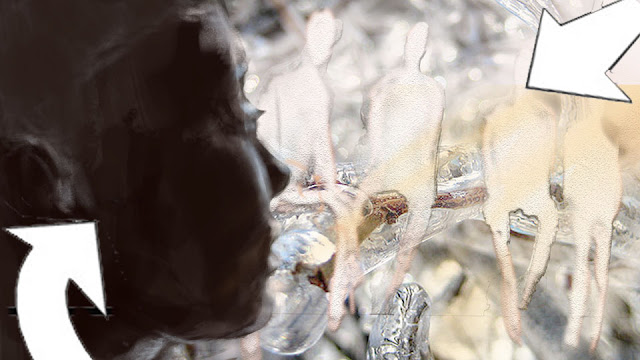
Tree scene with duplicated ice men...great to reflect back on some of the original inspiration and references for the icemen character - in this case the water woman in the Abyss...to keep a close eye on adherence to the original concept ideas.
I found that when I duplicated the iceman that the skin bind was lost...so in this scene I have one man directly in the scene (far right) and the others are referenced in (right click in an empty space on the Outliner and select reference). I created a stand alone scene file, with just a T pose iceman within it...this is the file that is referenced...


Sunday, 26 March 2017

Test render, using the UV mapped tree, IBL lighting, directional lighting in Maya

Test render using Mentalray - showing the UV mapped tree with bark, IBL lighting, directional lighting and the model using 50% thin glass and 50% frosted glass settings.
Left: Render view    Right: Geometry and image plane in perspective view and a tear off 'shot cam' panel, which gives me a camera view at all times, regardless of the viewing angle in the perspective viewport

UV mapping a tree in Maya

Final UV map: layout created by the Bonus Tool, then repositioning, scaling and creating a high resolution texture in Photoshop.

    Left: Map   Right: Perspective View
Left: Test render with a bump map applied at a setting of 0.5   Right: Perspective View

Saturday, 25 March 2017

Photoshop to create a scaled texture for Maya; using a UV Snapshot

Rather than having overlapping UV's or creating multiple sets, I am scaling and repeating the bark texture in Photoshop.
Left: UV map, rotated 
Right: UV map taken as a UVsnapshot (found in the drop down menu > polygons in the UV editor interface) - with the bark texture imge imported as a separate layer. scaled down and repeated. I have used the eraser on an airbrush setting, to blur out any hard edges. Each new segment of the texture, when created and copied by pressing (CTRL + ALT) automatically becomes a new layer. Once happy with how the bottom row of texture is looking I can then right click and merge all layers. The second row was a duplicate of the first, but rotated 180 degrees, airbrushed and tweaked to remove any visible hard edges or pattern repeats.
Tree with the new small scale bark image. Next step will be to adjust the UV map and figure out why a portion of the main branch remains smooth
In component mode I am able to select the faces on the geometry, where the texture is looking weird. I can then look at the UV editor and see which part of the map needs to be adjusted. I can use the cut UV tool and then smooth and optimise the map to reduce the distortion....
Using the settings in the UV editor to highlight the distorted areas
Applying a checkered/numbered texture so I can see how the pattern deforms along the branches...whilst the bonus tool was great to get the basic map, I've needed to adjust a couple of areas where the distortion was severe and the scale of the map so tiny that the texture was looking blurred and out of proportion. Whilst time consuming, this will be worth the effort in the long run...

UV mapping. Placing textures and normal maps onto a tree in Maya

 UV mapping the model using the UV Bonus Tool
Initial results in the UV editor

Applying a bark texture in the Hypershade UI
Initial test render showing the first results of a placed texture, using the UV map. I can then go back into the UV editor and play about with the scale of the map, to get the bark texture at a better scale. I like the mottled effect that this CG texture (free from CG Textures) is producing already.
Application of a normal map alongwith the texture. This render shot is before I've attempted any further scaling of the map.


Using the Maya bonus tool for UV mapping complex geometry

The start of creating a UV map for my tree, using the Maya Bonus Tool (download link, not a plugin) to create a fast UV map
I found this youtube tutorial link for using the bonus tool, to create UV maps for complex geometry
https://www.youtube.com/watch?v=UyhwoZTrB_s&index=31&list=PLR6NkeqscAx1r2b3gn0xPJqqfAe7tIEYy

Beauty and the Beast - 2017: Critical Review


Disney's Beauty and the Beast 2017.
Superb.
Having watched the original Disney 2D animation numerous times the new 2017 version manages to remain true to the original theme of the story, whilst catapulting it into outsnding 3D. The  lighting is stunning and textures. materials and CGI lighting utterly convincing.  
The editing pace, camera shots and story telling were efficient and action packed, and this is not simply a CGI visual $160 million experiment.
From a technical and production design vantage, the Baroque art direction managed to be stylised yet convincing and avoided any sense of pantomime. The colours of the opening ballroom scene reminded me of 'The Draftsman's Contract
The IBL lighting was inspiring and other than a couple of moments when the Beast was leaping across the towers, the CGI was invisible.
Absolutely brilliant film. Complete entertainment and CGI VFX and art direction craftsmanship..


Opening ballroom scene
 The Draughtman's Contract

Friday, 24 March 2017

First test renders of iceman - using Mia_material_x preset 50% frosted glass and 50% thin glass

First initial render test in Maya...
Ice figure is now modelled, rigged, weighted and UV mapped and is shown here using a mia_material_x shader and a preset Thin Glass 50% and Frosted Glass 50%. Once I have the correct shot lined up, I will lock the camera, tidy up the outliner and duplicate the iceman three times.

The image plane at the back of the shot is a still taken from the timelapse footage that I shot in Kingoodie, Scotland.
The tree was modelled in Maya and then the branches were embedded into the trunk by importing it as an obj into Zbrush and using the Dynamesh geometry tool and instantly changed it all into evenly spaced quads (brilliant).
The tree is shown in smooth mode and requires more work, plus a UV map which I will create using the Maya  unfold UV bonus tool and then I can apply a bark texture and a bump map.

This image also uses IBL and we've taken a still of this footage (rather than the correct IBL 360 degree image) to use as our IBL light source.... for the purposes of this film, it will work fine. A directional light has also been placed in the scene and the IBL sphere rotated with the rotate tool, so that the sunlight and directional light are all coming from the same direction

    Left: Test render shot.   Right: Perspective view
Left: Test Render    Right: Perspective view showing the IBL sphere and the model tree selected
Inside the IBL sphere with the direction light (brown arrows) pointing towards the image plane and tree
 Inside the IBL sphere, showing the tree and rigged character

Thursday, 23 March 2017

Final UV map

Iceman UV map using the bonus tool and then the view of the border edges, as shown in thick green lines in the perspective view.
I'll increase the scale of the head map, to give more resolution, but it's pretty much there!


Final paint weights and tree geometry


Finalising the paint weights on the legs and hips today...listening to Ceilidh music has also had an influence on the pose!
P
Below is a quick snap shot render (not lit) of the tree; which was modelled using cylinders and then  the sculpt brush to create some additional bumps and quirks to the bark.
Tomorrow, I will clean up the tree mesh and create a bonus tool UV map and begin to put the scene together...and then spend some time with Sean to double check the render settings and refractions of the water shaders on the ice men...


Sunday, 19 March 2017

UV mapping using the bonus tool

Re-discovery of the Maya UV editing bonus tool!
This was a great way of creating quick border edges.
Not sure what happened at one point, but I managed to actually select and create two unwanted border edges, randomly on the shins. Took a while to find and select them, but once found, even though it wasn't possible to delete a border edge, I was able to shift select and choose the 'merge border edge' option...

I've put this checkered material on the model, so I can see how the UV map is laid out and scaled...


Thursday, 16 March 2017

UV mapping in Maya

Continuing UV mapping...
I've decided to make the seams run down the sides of the body and the under side of the arms...
Image below shows the UV editor interface and the shell selected both on the UV space and in the perspective model

UV optimise tool using a large brush size (yellow circle). Optimise tool evens out the map and removes distortion

Wednesday, 15 March 2017

UV mapping Maya

Iceman is ready with new geometry, rigged, weighted...
UV mapping now, using the UV editor, automatic mapping and then cutting the map to make sure that the seams are at the back...
This really reminds me of costume design and paper pattern making at Wimbledon School of Art...

Using the sew UV tool, with a brush size that will only select and incorporate the edges that I require to be sewn (if the brush size, indicated by the faint black circle in the image below, is too large it will cover a multitude of edges - and will attempt to sew them all together - and the result will be a mess.
Only the two edges of the arm - as highlighted by the orange line - will be sewn together. The last segment on the right show edges highlighted in red. These will be sewn together by click and drag select...


Using the unfold UV tool, to smooth out the map...I am using the space outside of the UV area to work on, and will move and scale the map accordingly, once done, and fit it all onto the UV area


Sunday, 12 March 2017

New knee geometry with weighted deformation in Maya

New knee geometry with weighted deformation

This low angle shot has given me an idea for one of the opening shots of the ice men...glimpses here and there, but we're not sure exactly what we're looking at to begin with


Saturday, 11 March 2017

Default paint weights - prior to re-influencing

New hip geometry - retopoligised with quad draw tool.
Default paint weights shown, prior to adjustments of the influences with the paint weight tool


New geometry and rig - skinned

New geometry and rig - skinned

Creating new topology for the knee joint, for good deformation


During the paint weights process I realised that the geometry I'd created (particuarly the knee joints and shoulder joints) would have poor deformation...
So, whilst it was time consuming, I decided to make my existing model a live surface and re draw the topology with the Maya quad draw tool.
tip: if the quad draw tool begins to lag, then delete history..

I then selected my geometry, and exported the selection as an .obj file. imported it directly into my scene that includes my rig, made sure everything was lined up and re-skinned it...

Below is a shot of the old knee topology and the new knee topology.
Although my ice men won't move much, they do need have a lot of knee, shoulder and hip deformation, and this process was definitely a great practice exercise in modelling