Thursday 1 December 2016

Camera Tracking Nuke X movie

Camera tracking in Nuke X composting sofware...

Final tracked image showing an imported 'plane' with checkerboard texture (as created in the workflow below).

     
Converting UHD 4K video to HD
Removing lens distortion, line analysis and drawing mode...drawing straight lines over any straight lines in the footage..
Analyse lines
Save
Input Read command and Camera Tracker...
Number of features 600
Feature separation 6
Select frame range eg. frames 50 - 300
Track
Once tracked, if there are any moving objects, such as people or cars, then remove those trackers manually.
Solve
Error value of below 1 is required.
The green markers are shown top left.
Any markers shown as red are rejected
Orange are to be solved.
The graph top right allows for the slider inputs to change the maximum error value. Tweak repeatedly until the error value is less than 1.

Hover mouse over view panel (top left) of the workspace and press 'TAB' to switch between 2D and 3D views

3D view showing Camera tracker cloud (white blob markers in 3D environment)

To import into Maya, in order to insert 3D objects that are embedded and move seamlessly within the scene, a scale and an origin need to be set; plus a selection of markers showing the ground plane need to be established.

To set origin in 2D viewer
Right click on a single marker on the ground
Select 'ground plane'
Select 'set origin'

To set scale:
Select one marker, SHIFT and click another
Right click
Select scene
Add
Scale distance (set scale dimension to the same as a known distance within the scene. In this case a paving slab of 40mm)

Magenta markers shown below in the 3D view, indicate the camera tracker markers that were selected on the ground plane.
Select markers on the ground
Right click
Ground plane
Set to selected


To test that the camera tracking, lens distortion correction etc are all working well, place a 'card' into the scene.

Select tracker
Create
Card
'TAB' key and Scanline Renderer node to toggle between 3D and 2D views
Card placed and rotated.
Apply texture if necessary with TAB key 'checkerboard'

Send Camera and locator to Maya
Select Scene 1 (shown as red circle in node graph below)
TAB key
Write geo 
Double click 'write_geo' node
File (black folder icon similar to file folders in attributes box in Maya)
Name file 'tracked_camera.fbx
In the options box (5 options, Geometries, Cameras, Lights, Axies, Point Clouds) just select cameras and point clouds.
Execute - select frame range
Open Maya
Set frame rate to 25 fps
Set project etc
File import 'tracked_camera.fbx
Can take a while as it imports a camera every frame, and each frame is key framed

Sunday 27 November 2016

Knee contollers and contrain pole vectors


Timelapse of slow moving clouds going on in one corner of the room and in the other, I am creating Knee controllers...

Create a text 'K' and snap to knee joint, then move outward on the Z axis
Delete History
Freeze Transformations
In outliner, select R_KNEE control first then select R_ankle_IK > Constrain>Pole Vector


Saturday 26 November 2016

The Photographer's Ephemeris

A bit more research on preparation for Timelapse...I have a Panasonic 4K professional camera, plus the Atomos Ninja Assasin...
Going to check out this link, to get some good information on sun and moon positions in various locations,,,

Love this Bach piano too

     
The Photographer's Ephemeris Desktop Web App - Demo from Crookneck Apps on Vimeo.


IBL

IBL lighting...class with Sang yesterday...

Showing the first image of the class; a sphere with an .edr file applied in Hypershade...
Saved the other images onto my U drive - rather than my pen drive. Doh!


Reflective Practice; Boredom Research 'After Glow'


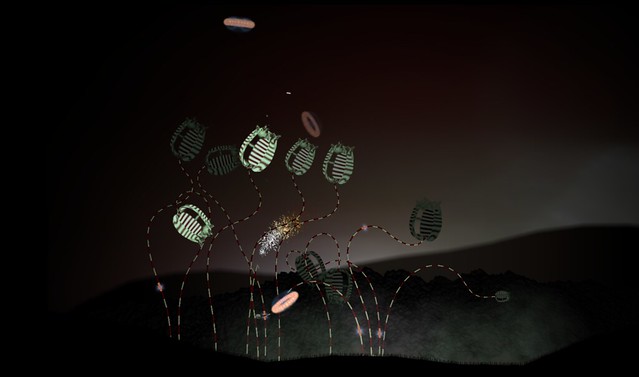
A landscape locked in perpetual twilight becomes illuminated by glowing trails evocative of mosquito flight paths. These spiralling forms represent packets of blood infected with Plasmodium knowlesi a malaria parasite recently found to jump the species barrier from monkey to human.

I was inspired at how the collaboration between the arts and science can bring about a common platform and medium, where all can be inclusive; that being scientific data, mathematics, patterns, light, shadow, dark, animation, visual aesthetics and drama.
I particularly liked the photographic still shown below, from the animated film 'After Glow'; I watched it in the reception area of the Life Sciences Gallery, Dundee, University.
I had no information or knowledge regarding the subject matter of the film, and imagined that the swirling light patterns were DNA Helix spirals, and the flare points (bright spot with horizontal flash lines below) was a depection of cell synthesis mutation or growth...

My understanding from the lecture, that these spiralling forms represent Mosquito flight paths, and the flash points are when the opportunity of infection is present...


As part of the lecture, Vicky Isley and Paul Smith elaborated on their fascination with life cycles, patterns, growth, death, recession and expansion...
This particular image below ' Dark Storm Phials' reminded me of one of the shots that I've included in the opening sequence of Thaw....a stagnant and emotionally frozen woman, superimposed over a field of dying poppies...
Dark Storm Phials

Thursday 24 November 2016

Maya Rigging - using the Mirror Skeleton option box

Rigging; using the Mirror Skeleton option box


Rigging the ice man

The beginning of rigging the ice man...
I love how the rigging looks in the Outliner....the structure and order of it are very relaxing!