Friday, 11 November 2016

Zbrush; Death Star & Gluteus Maximus


Using new software (such as Maya and Zbrush) is like playing a highly technical advanced video game (blindfolded), with a controller that makes the Death Star look like a beach ball - and the game is to figure out which buttons make your character jump, crawl, spin and ultimately level up...and once you figure it out, accidently click a button you didn't know existed and jump into a completely new game/world/scene; freeze your software, loose your tools/emblems/wands/gems/coins and watch your Death Star incinerate....

Not today Zbrush!

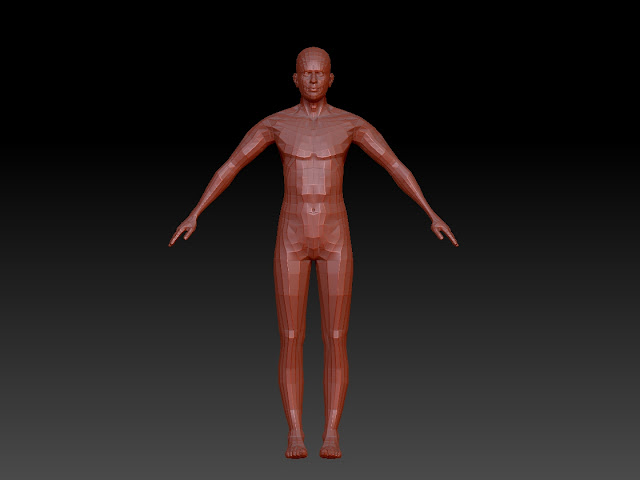
Ice man creation....

Import Turbosquid model as an .obj file

Use the sculpt tools (clay build up, move, smooth and Dam Standard) to apply the muscular structure....remembering everything that was taught in Elizabeth Hammond's life drawing anatomy classes at Medway College of Art & Design (Kent Institute)....particularly the structure of Gluteus Maximus


Thursday, 10 November 2016

The Accountant - critical review

Within seconds of leaving the certification screen, this film is intense.
The opening sequence is brilliant. Set against a tense soundtrack of gun shots and pleading fear, the first shots focus on extreme close ups of feet walking tentitively along a tenement block corridor; switching momentarily to a close up of the gun...

As the audience, we are given no respite from these intense camera views throughout the opening sequence. It's not until nearly the end of the film that we find out who the feet belong to; and why this opening scene is crucial to the narrative; very similar to how the storyline is engineered in Pulp Fiction.

As a storytelling device, this intense visual 'emotional lock-in' repeats throughout the film;  pounding strobe lighting and intense Radiohead music; whispered chanting; rage attacks; frantic equations and violence.
That said, the acting is actually sensitive and subtle, the characters are fairly well observed and, at odd moments, surprisingly humourous.


Although I found the storyline confusing, and I wasn't entirely clear who the main protagonist was at times, this film was gripping and the editing was great.

Re-sculpting a Turbosquid model in Zbrush


First tests in creating the ice figures...
Using a Turbosquid model, and adapted, shaping and sculpting the geometry in Zbrush...
To be continued!


Sunday, 6 November 2016

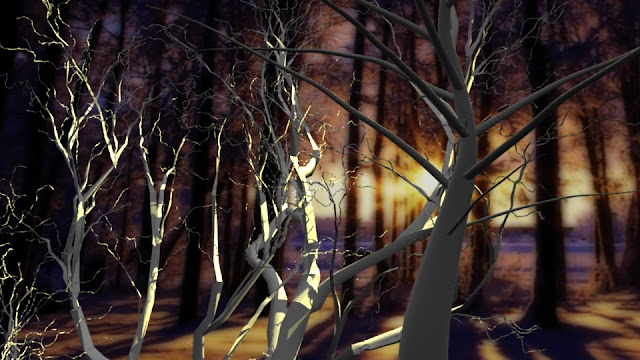
Turbosquid trees, spotlights and an image plane

Hypershade in Maya, to create a quick image plane of winter trees


Lighting tests using an image plane, two spot lights and a couple of Turbosquid obj tree files...


Dr Strange - Critical Review

Dr Strange...

Well this wasn't what I expected at all!

Very entertaining, high paced, humourous and brilliantly executed film....

The editing is fast, the storyline compact the VFX and CGI, whilst very prevalent are fairly 'invisible' within that world and the story is well told...and there is a clear spiritual message contained within the structure...
Definitely comedic and dramatic, with a theme of chaos to order and belonging...

My summary
Grasshopper training, for an arrogant ignorant 'X-Man' , set in the Far East and the ER!


Thursday, 3 November 2016

Borrowed Time - Pixar. Critical Review

Great animated short 'Borrowed Time' from Pixar - exploring grief with an ending, that's also a beginning.

With little dialogue and sunlight representing a bright spark of hope, this is a simple tale of trauma, loss and ultimately acceptance and hope...
I particularly like the fluid movement of the fabric, the sound of the wind and the character's hair blowing in the breeze...and these elements really add a sense of time passing and this film is a poetic exploration and depiction of grief, guilt and trauma

Mark Grindle suggested that I include the sound of thawing ice, right at the front end of my film...this will give a subtle message of hope from the get go....
I could see how this idea played out from the start in this short - particularly with the sunlight glinting on the gitfed pocketwatch....


Sunday, 30 October 2016

Zbrush Retopolising for export into Maya

Zbrush Retopology Class - creating a low poly head using ZRemesher
Duplicated low poly head below; orange/black dotted lines indicate the 'ZRemesher Guides Brush'.
Using symmetry mode 'X' I drew on the guides (around the eyes, mouth, nose and neck)

Setting the Target Polycount to 2 - Quad count was around 7000
Setting the Target Polycount to 1 - Quad count was around 3000
Generating 'dummy' head geometry for retopologising
Duplicate the highpoly head - rename to 'Decimated_head' > Zplugin>Decimation Master>Pre-process current (NOT ALL!)> set percentage of decimation (e.g 10%) > press Decimation Current.
Export Decimated_head subtool as an obj file

Save!!!
Preparation for retopologising in Maya
Quad Draw tool does not support the 'X' symmetry function, so we have to delete half the head, work on that and then duplicate, mirror and merge


Using the quad draw tool, to draw live 'magnetic' quads onto the head.
We deleted most of the quads around the eyes, mouth and nose, as these areas are the ones that are likely to have most deformation when it comes to animation.
Quad draw and 'CTRL' then allow for multi-cuts and additions of edge loops to create good details